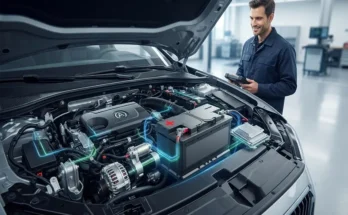


Few automotive moments match the quiet sinking feeling of turning your ignition key or pressing the start button only to be met with a rapid clicking sound or complete electrical silence. A dead 12V car battery can leave you stranded right in your own driveway. While modern vehicles are packed with sensitive computers and complex electrical wiring, changing a car battery remains one of the most approachable and empowering DIY maintenance jobs you can tackle.
Approaching the task with methodical care ensures your personal safety, protects your vehicle’s delicate onboard electronics, and sets you up to successfully collect your core charge refund when the job is done.
Safety First: Essential Gear and Precautions
Before touching a wrench, preparing your workspace and protecting your body is non-negotiable. Traditional automotive batteries contain corrosive sulfuric acid and heavy lead plates, while modern electrical systems demand respect to avoid accidental short circuits.
- Essential Gear: Always wear safety glasses and acid-resistant work gloves. Keep a baking soda and water mixture nearby to instantly neutralize any accidental acid spills.
- Tools Required: A basic metric wrench set (usually 10mm or 13mm for terminal nuts and hold-down brackets), a wire terminal cleaning brush, and optionally, an OBD-II memory saver plugged into your accessory port to preserve radio presets and computer codes.
- Environmental Safety: Park your car on a flat, level surface, engage the emergency parking brake firmly, ensure the ignition is completely switched off, and allow the engine compartment to cool if you were just driving.
Step-by-Step Battery Replacement Guide
Working systematically through the removal and installation process prevents accidental sparking and ensures a secure, reliable connection for your new power source.
- Step 1: Locate the Battery and Gain Access: While most batteries sit visibly under the hood, some modern vehicles tuck them away in the trunk, beneath the rear seats, or inside a protective plastic shroud. Remove any covers or air ducts necessary to gain clear access to the terminals.
- Step 2: Disconnect the Negative Terminal First: Always loosen and remove the negative (-) terminal (marked with a minus sign and usually attached to a black cable) before touching the positive side. Disconnecting the negative ground first prevents accidental sparks if your wrench slips and touches the vehicle’s metal chassis. Tuck the cable safely aside so it cannot spring back. Once clear, remove the positive (+) terminal (marked with a plus sign and a red cable).
- Step 3: Remove the Hold-Down Clamp: Batteries are heavy and can shift during driving, so they are secured by a bottom flange clamp or an overhead cross-bracket. Locate this bolt (often requiring an extension bar on your socket wrench), unbolt it, and lift the bracket out completely.
- Step 4: Lift and Extract the Old Battery: With both terminals and hold-down hardware removed, carefully lift the heavy battery straight up and out of the engine bay. Keep your back straight—standard automotive batteries weigh between 30 and 50 pounds.
- Step 5: Clean the Terminals and Tray: Before dropping the new unit in, inspect the metal battery tray for debris or corrosion. Use your wire terminal brush or a paste of baking soda and water to scrub away any white, powdery acid corrosion on the vehicle’s cable clamps until the bare metal shines.
- Step 6: Install the New Battery: Place the new battery securely onto the tray, ensuring it faces the correct orientation so the positive and negative posts align with their respective cables. Reinstall and tighten the hold-down bracket. Finally, connect the positive (+) terminal first, followed by the negative (-) terminal last. Tighten the nuts firmly, but do not overtighten, as you can crack the lead posts.
Understanding and Claiming Your Core Charge
When you purchase a new car battery at an auto parts store or online, you will often notice an extra fee listed on your receipt labeled as a “core charge.”
- What Is a Core Charge? This is a mandatory environmental deposit designed to encourage recycling. Automotive batteries are packed with recyclable lead and toxic acid. The core fee ensures that old, dead batteries find their way back to certified recycling facilities rather than ending up in municipal landfills.
- How to Collect Your Refund: Claiming your money back is simple. Take your old, dead battery and place it securely inside the plastic box or packaging that your new battery came in. Load it into your trunk along with your purchase receipt, drive back to the auto parts retailer, and hand it over to the counter staff. They will process your return and instantly refund your core charge in cash or back to your card.
Post-Installation Checks and Computer Resets
Once your new battery is bolted down and connected, turn the ignition key to the “on” position or press the start button without holding the brake to power up the electronics.
- Check that all dashboard warning lights initialize correctly and that accessories like your headlights, blower motor, and radio function as expected.
- If you did not use a memory saver, you may need to reset your dashboard clock, reprogram radio stations, or recalibrate your automatic power windows (which often just requires rolling each window all the way down and holding the switch up for a few seconds).
Changing your own 12V car battery is a satisfying rite of passage that saves you diagnostic and labor fees while building genuine mechanical confidence. By following a safe, methodical replacement procedure and returning your old unit to complete the recycling loop, you keep your vehicle running reliably while practicing responsible automotive DIY.